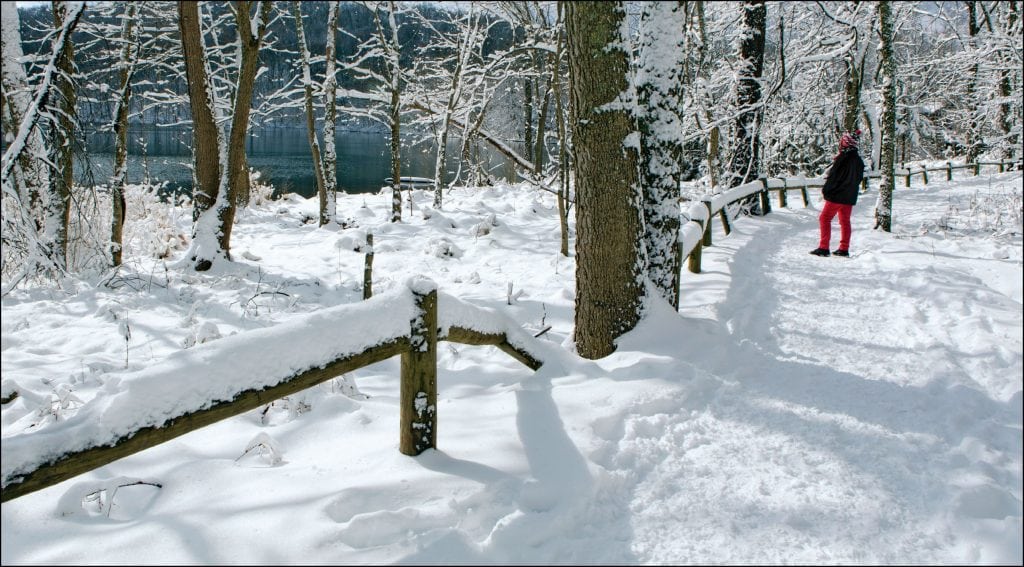
“Winter Hike” by Robin Conover Canon EOS 6D 24-70 mm, 2.8 L IS USM lens at 24 mm ISO 200, ƒ18 at 1/80 second, handheld
The chance to photograph a freshly fallen snow in Middle Tennessee is usually fleeting at best. For this reason, I usually keep gloves, a winter toboggan, long underwear and a coat in the car throughout the winter. Being prepared with clothing to stay warm was the first step to capturing this image.
When this rare deep, fluffy snow hit Nashville last winter, I had to get out in spite of the cold and start shooting. Three things combined that day to help me make this a successful and interesting image: making a correct exposure, following the rule of thirds and being lucky that a hiker in bright, red pants came along the trail.
When it comes to photography, being prepared — including understanding how your camera “sees” and how it calculates an exposure — will help you avoid some common mistakes.
Exposure — “Auto” is not necessarily the best setting for any photography, particularly if your subject is very bright or very dark. The meter will be tricked into an incorrect exposure.
Auto metering very bright scenes will result in underexposed images unless you intervene. This means the bright, white snow will look dingy because the camera is metering for medium gray, trying to find an exposure that will render most of the scene at an effective reflective rate of 18 percent grey, a tone halfway between black and white.
One way to prevent this underexposure is to meter elsewhere such as the blue sky. That’s how I chose the exposure for this image. If the sun is evenly lighting your subject, simply point your camera to the deepest blue in the sky and take a reading by pressing the shutter button halfway down.
You can then use those settings to make a manual exposure or lock in the exposure by depressing the exposure lock button on the back of most DSLR cameras. The exposure lock method will work for one shot. You will have to remeter on the sky each time you take a photograph.
Exposure compensation is another option. Setting the exposure compensation will take effect on everything you shoot until you change it. For brightly lit situations, you will want to set the compensation somewhere between +2/3 and +1 1/3. This will vary based on the brightness of the scene. You will have to experiment a bit to arrive at the correct compensation.
Refer to your owner’s manual for more information about exposure lock and exposure compensation.
Rule of thirds — One of the most important and basic concepts in composing a successful photograph — abiding by the rule of thirds — will add interest, balance and energy to your images.
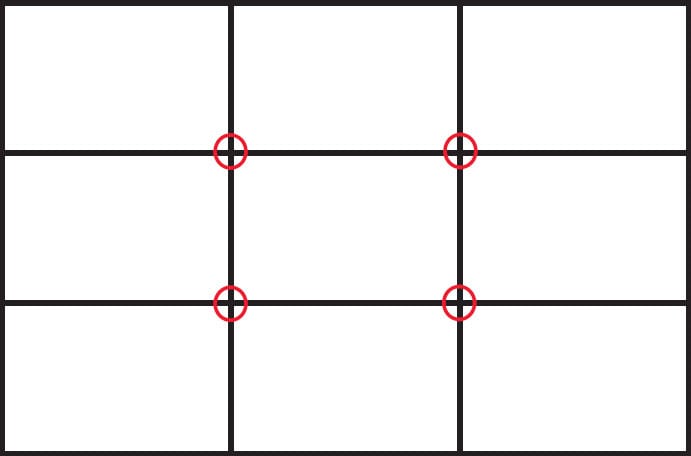
Auto focus leads to far too many images being perfectly centered, which often result in weak, boring compositions. To prevent this, visually divide your viewfinder equally into thirds, both vertically and horizontally, as shown above.
Many smartphones have this option, which is usually referred to as a grid.
Placing your main subject off-center, near where the lines intersect, will create more visually aesthetic images. It also gives you more opportunity to use other composition techniques such as leading lines.
Seeing red — Another element visual artists use to capture the viewer’s eye is color, particularly red. It was a stroke of luck that the hiker walked into my image at just the right time, giving a decent composition the perfect pop of color.


