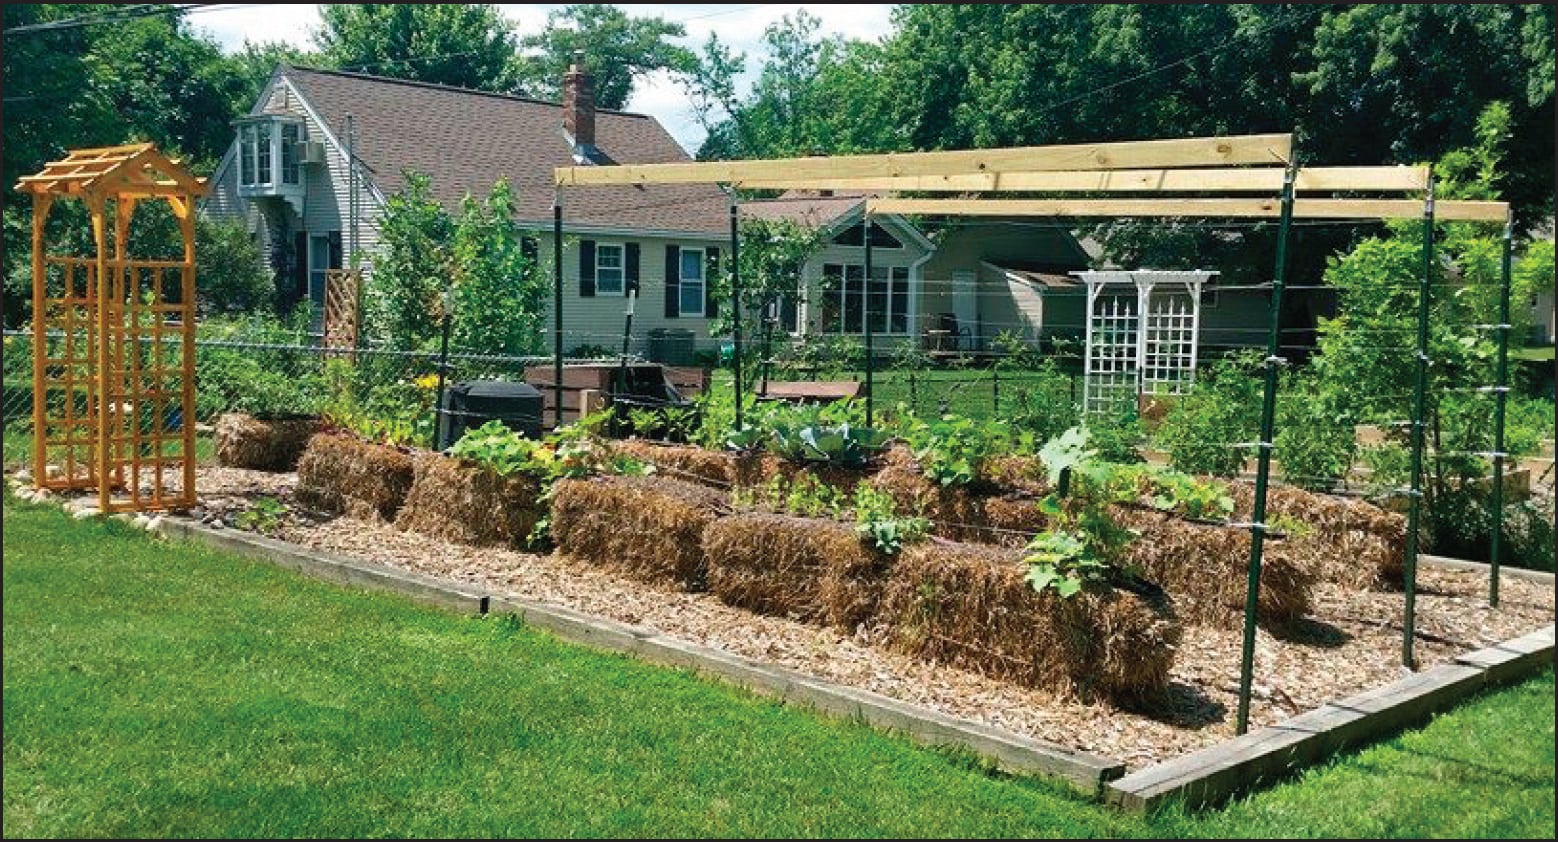
For the residential gardener, especially one with poor soil or limited space, straw-bale gardening is the solution.
“Straw-bale gardening is very straightforward and productive,” says Joel Karsten, author of “Straw Bale Gardening Complete” and his 2018 book, “Straw Bale Solutions.” “You’re starting with a clean slate that’s disease- and insect-free, and no matter what kind of soil you have, you’re creating the optimal growing conditions for fruits, vegetables and flowers.”
Karsten first developed straw-bale gardening nearly 30 years ago as a recent college graduate from the University of Minnesota with a degree in horticultural science. “We didn’t have a lot of money when I graduated, so we decided to grow our own vegetables,” he says. “Having grown up around farming, I noticed that a thistle plant was thriving in a broken bale of straw, so I thought, ‘Why not use the same technique for growing vegetables?’ The soil at our first home wasn’t that great, so we tried it, and it worked.”
As a scientist, research drove Karsten to grow a 50-bale test garden. “The roots responded well to the nutrients in the bales and the inner heat,” he says. “I reached out to my former professor who said he’d be curious about my research, but for the 14 years, no one seemed to care much about it.”
All that changed when a television reporter at a local station in Minneapolis did a story in 2005. “It exploded after that, and we’ve taken straw-bale gardening around the world.”
Karsten has introduced the concept in Southeast Asia, Africa, Australia and even inside the Arctic Circle. “It has taken on a life of its own, both for homeowners and commercially,” he says. “And it’s really caught on for people with poor soil or limited garden space. It’s like container gardening without the container and the convenience of raised beds with little need for weeding.”

How It Works
Start with a bale of wheat straw, the kind that’s held together with twine. Place the bale in a spot on your lawn, patio or deck where it can receive at least six hours of full sun daily. For the first 12-15 days, you’ll condition the bale with lawn fertilizer (make sure it has no herbicides or weed killers) and periodic watering.
Position the bales nonstring side up, cut edges exposed upward, and place bales end-to-end in rows. If you’re putting them on a patio or deck, place them on landscape cloth to keep them neat. Leave about 6 feet between rows of bales for easy access and harvesting.
Each day, you’ll add more fertilizer, water or both, according to specific amounts, usually either ½ cup or ¼ cup per bale per day, followed by a soaking with water. “It takes about two weeks to condition a bale,” Karsten says. “You’ll start seeing results of decomposition and the heat it generates by the end of the first week. A lot of biology happens in those bales.”
The bale is conditioned in much the same way compost is produced. Bacteria feed on the nitrogen that’s produced during decomposition, breaking down the straw and creating a nutrient-filled growing medium.
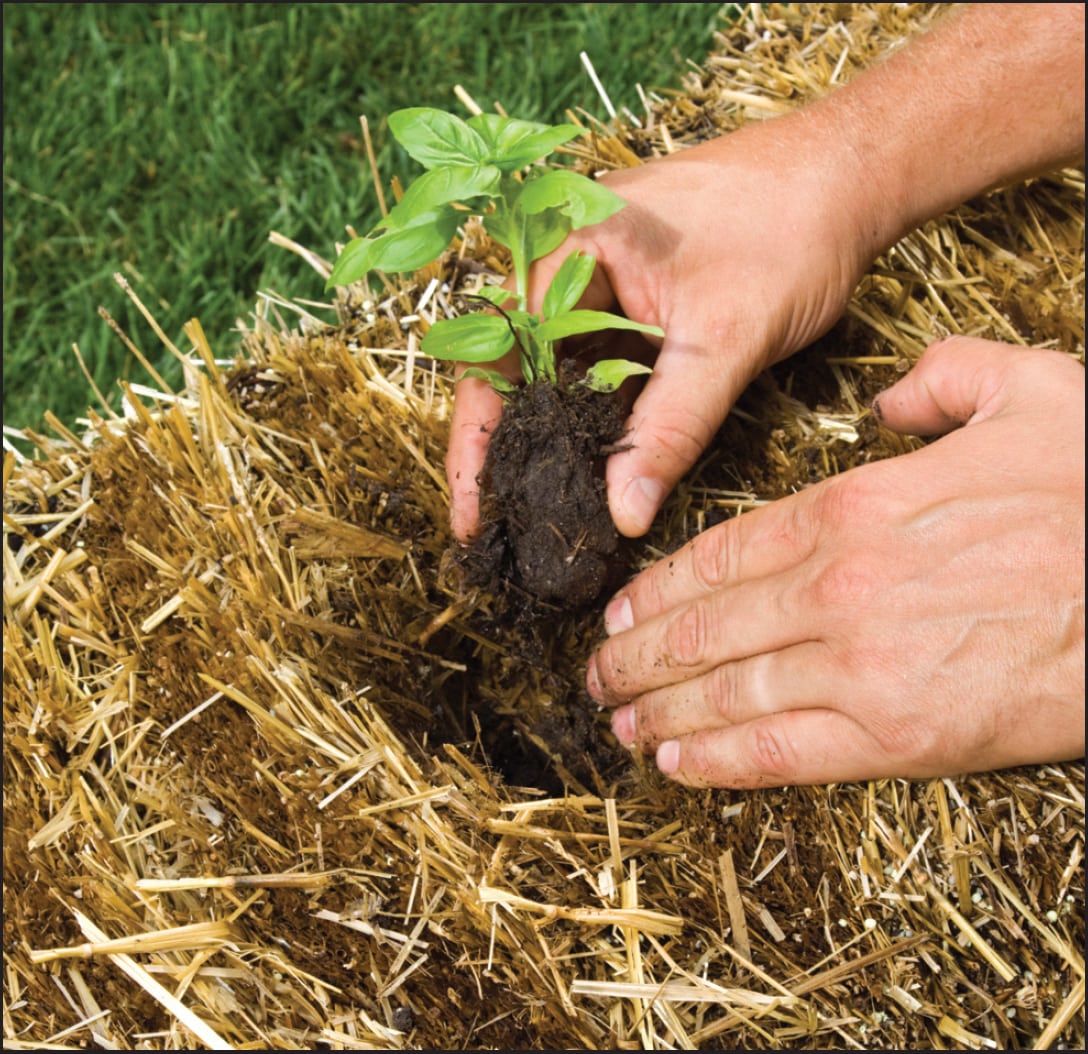
Once the bale is property conditioned, you can plant seeds or seedlings directly. Kasten recommends using seedlings for novice gardeners and those who want a quicker start.
“Be careful with planting seedlings after the 12th day,” he says. “Stick a meat thermometer into the bale, and as long as the internal temperature is less than 105 degrees, it’s safe to plant seedings. You can add water to reduce the temperature.”
Use a trowel to dig a hole in the top of the bale a little bigger than the root ball, removing any netting or peat pots, then place the seedling into the hole, following the suggested distance between plants on the label.
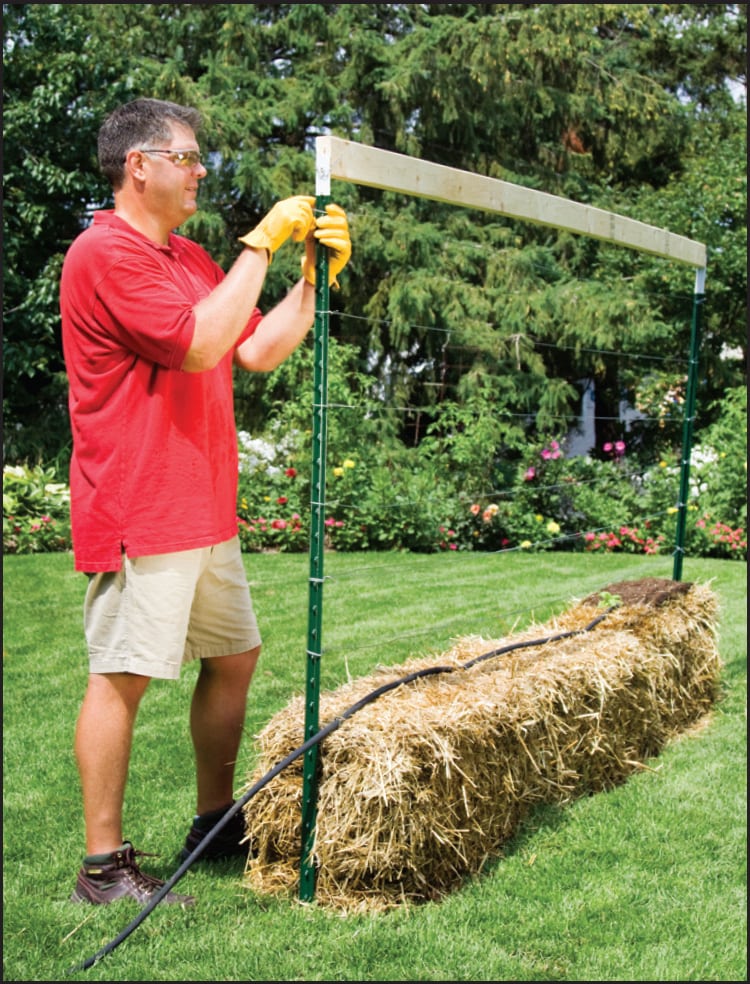
You can add some sterilized potting mix to fill in the gaps; it should be weed- and disease-free. Be sure to monitor the bales daily to maintain consistent moisture. If they feel dry several inches into the bale, water them. Running drip irrigation can help with watering consistently.
Continue to fertilize the bales as you would your in-ground vegetable garden.
Straw-bale gardening makes the harvest more convenient. “It’s like using raised beds,” Karsten says. “You don’t have to bend down to tend the plants or harvest your crops.”
Some of the most popular crops are tomatoes, squash and peppers, but by installing a trellis on each bale, green beans, cucumbers and other vining or trailing plants will grow very well. But straw-bale gardening isn’t limited to vegetables.

“People grow fruit like strawberries, herbs or flowers in straw bales,” Karsten says. “Some people plant flowers or foliage annuals on the sides. Begonias and impatiens are good choices that will thrive alongside vegetables. And, it’s really easy to grow a kitchen herb garden in a straw bale.”
Admittedly, the straw bales will break down over the growing season. “They’re not the prettiest thing in the world, but they create beautiful mulch that you can use in planter boxes, add to your compost pile or use in your garden next season,” he says. “Just take the strings out and push the straw into a pile. Then you can move it wherever you like.”
Sometimes bales can be reused for a second planting if they’ve remained intact. If you’ve used landscape fabric beneath them, they’re likely to hold up for a second season. But Karsten suggests starting each season with fresh bales to reduce the risk of disease.
“If you follow the basic directions, you’ll have about a 70 percent success rate,” he says. “And at least one-fourth of that will be bigger and better than your yield from traditional gardening.”
For more information about straw-bale gardening techniques, visit Karsten’s website, strawbalegardening.com.


